
Default Batch Processing #
The Batch Processing tool is designed for processing multiple projects simultaneously and can be used for both RTK and PPK datasets. Most configuration settings carry over from other processing methods explained in Main Window Breakdown. Navigate to Main Window Breakdown if needing further breakdowns of these tools.
Detailed Procedure #
Transfer Data:
- After recording a dataset, remove the USB thumb drive from the payload and plug it into the computer used for data processing.
- Navigate to the root folder containing the recorded dataset and copy the entire flight folder locally to the computer for faster processing speeds.
- If a custom project name was set through the “Status” page of the GUI, it will appear as a prefix to the automatically configured flight name stamped with UTC time. The generic naming convention for the dataset is as follows: RESEPI-AAAAAA-BBBB-CC-DD-EE-FF-GG
- AAAAAA: The device’s internally broadcasted Wi-Fi SSID.
- BBBB: The year the data recording was initialized.
- CC: The month the data recording was initialized.
- DD: The day of the month the data recording was initialized.
- EE: The hour of the day (based on 24 hours) the data recording was initialized.
- FF: The minute of the day the data recording was initialized.
- GG: The second of the day the data recording was initialized.
- If a custom project name was set through the “Status” page of the GUI, it will appear as a prefix to the automatically configured flight name stamped with UTC time. The generic naming convention for the dataset is as follows: RESEPI-AAAAAA-BBBB-CC-DD-EE-FF-GG
Activate License:
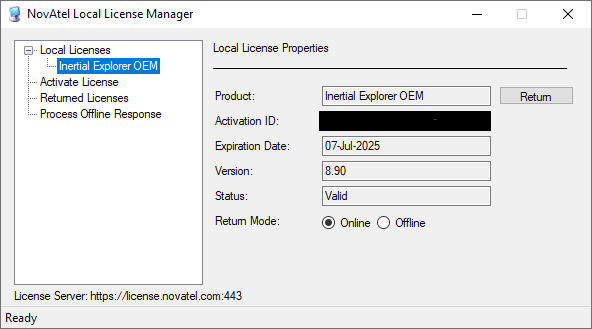
- Ensure that your PPK license is activated when performing PPK processing, as shown in Figure 1. This is not required for RTK.
- Configure Batch Processing:
- Open PCMasterProGL and navigate to Toolkits > Batch Processing.
- Do not close the PCMasterPro window, as it will be used for trajectory selection.
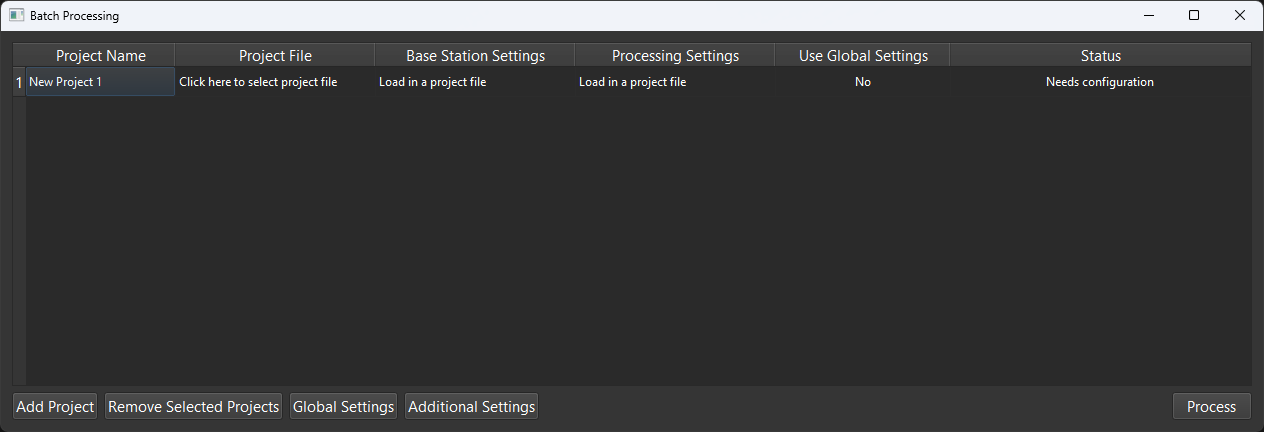
- Optional: Name the first project by selecting “New Project 1” under the “Project Name” tab, as shown in Figure 2.
- Select “Click here to select project file” undo the Project File column and navigate to the .pcmp file for the desired project.
- Allow time for unpacking data files after file selection. Progress will be shown in the bottom left corner of the PCMasterPro window.
- Configure the project:
- Status will show that a project either “Needs configuration” or is “Configured”
- Open PCMasterProGL and navigate to Toolkits > Batch Processing.
- Project Configuration:
- After a project file has been loaded the user can now configure the base station along with general processing settings
- An option for “Click here to configure base station settings” and “Click here to configure processing settings” will appear
- Choose to edit the default project Cloud Filters settings
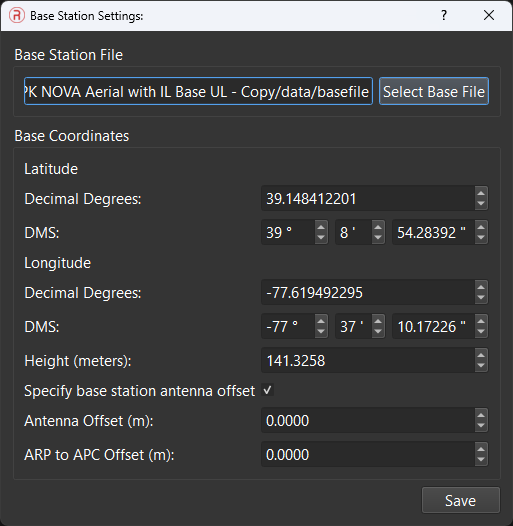
- Configure the base station settings if desired
- The base station file will automatically be read if in the correct location. Otherwise, the user will need to manually enter the file location.
- Location and settings will be read automatically and loaded in for the user to configure if needed
- Select “Save” when finished
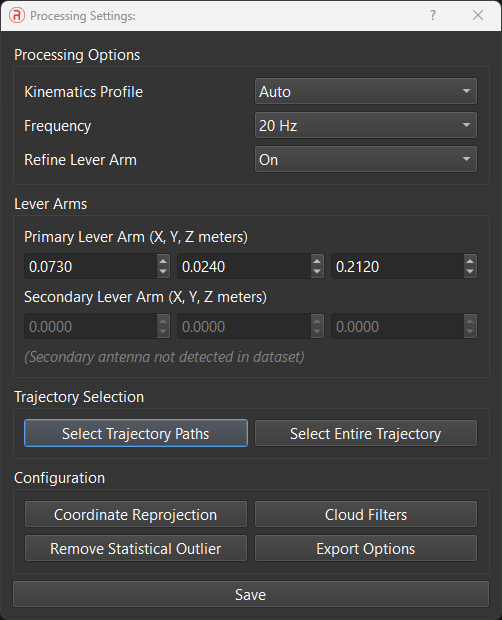
- Configure the processing settings
- This menu gives full access to all settings within the typical PPK workflow
- The only required field within this menu is trajectory selection. Other items will either be read from the project file or load default values.
- Select “Save” when finished
- Add, configure, and remove as many projects as needed
- Add another project by selecting “Add Project”
- Remove a project by highlighting the project number on the far left and selecting “Remove Selected Projects”.
- After a project file has been loaded the user can now configure the base station along with general processing settings
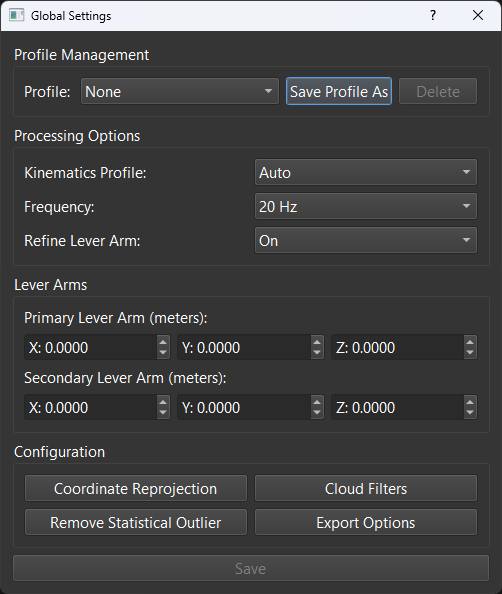
5. Global Settings
- Global Settings shows an almost identical Processing Settings window with a dropdown for selected profiles. Profiles can be created, saved, and loaded for users that have repeating workflows. Once configured, the user can select “Save Profile As” to save to a profile and then finish with the “Save” button.
- After a profile has been selected, the user can go to specific projects and click in the “Use Global Settings” column to determine which projects will use this setting. If no trajectory is selected, the entire trajectory will be selected as default.
6. Settings and Processing:
- If merging LAS/LAZ clouds from multiple projects into a single file, processing all datasets simultaneously, deleting unnecessary cloud files, or changing the output directory is needed, configure these options within Additional Settings in the Batch Processor window.
- The default output directory for any project is the “clouds” folder within each project folder.
- The “clouds” folder is only created upon LAS export, so it will not be visible upon unpacking.
- The default output directory for any project is the “clouds” folder within each project folder.
- If merging LAS/LAZ clouds from multiple projects into a single file, processing all datasets simultaneously, deleting unnecessary cloud files, or changing the output directory is needed, configure these options within Additional Settings in the Batch Processor window.
7. Begin Processing:
- When ready to begin processing, select the “Process” button.
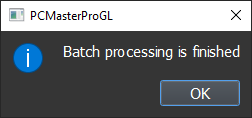
- The stage or “Waiting” will be shown in the “Status” column. Upon completion, the clouds will be produced in the “clouds” folder unless specified otherwise.
- A pop-up message will indicate when processing and projection are finished, as shown below.
- When ready to begin processing, select the “Process” button.
To observe the entire process in practice, we suggest viewing the video recording below.