

SLAM Mission Step-by-Step #
This guide walks you through the full process of performing SLAM (Simultaneous Localization and Mapping) scans using a RESEPI payload, including LITE, Ultra LITE, and GEN-II models with 360 degree laser support. It covers setup, initialization, scanning procedure, and data retrieval for both GNSS denied and georeferenced missions.
1. Powering the RESEPI Unit #
- Power Connections:
- Use one of the supported input connectors:
- XT60
- Skyport/Other
- Binder connector
- Ethernet (GEN-II only)
- Power specs:
- RESEPI LITE and Ultra LITE: 9–36 VDC (up to 45 V supported).
- RESEPI GEN-II: 9-50 VDC.
- RESEPI LITE and Ultra LITE: 16–47 W consumption.
- RESEPI GEN-II: 40-75 W consumption.
- Use one of the supported input connectors:
- Insert USB Drive:
- Plug the provided USB into the RESEPI device.
- Not required during recording for GEN-II models.
- Plug the provided USB into the RESEPI device.
- Turn On the Unit:
- Press the power button to boot the device.
2. Connecting to the RESEPI Web Interface #
- Connect via Wi-Fi:
- Connect a phone, tablet, or computer to the RESEPI’s Wi-Fi.
- SSID: Listed on the device label
- Password: LidarAndINS
- Connect a phone, tablet, or computer to the RESEPI’s Wi-Fi.
- Access Web Interface:
- Open a browser and go to: 192.168.12.1
- Update Settings:
- Navigate to the Status window to configure the SLAM Settings menu
- This is optional, but recommended for faster post processing workflow
- If not using Outdoor (georeferenced) or Indoor (non-georeferenced) settings, the user can use custom settings in PCMasterPro SLAM window
- Click Save
- Navigate to:
- Settings > Geometry > Vehicle to IMU Rotation
- Set values: Yaw: 0, Pitch: 90, Roll: 0 – for standard configuration
- Click Save
- Settings > Geometry > Vehicle to IMU Rotation
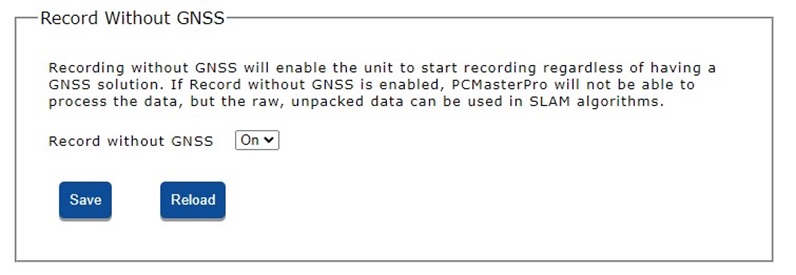
- For GNSS denied scans:
- Go to Status Tab > Record Without GNSS
- Enable “Record Without GNSS”
- Click Save
- For georeferenced scans:
- Go to Status Tab > Record Without GNSS
- Disable “Record Without GNSS”
- Click Save
- Navigate to the Status window to configure the SLAM Settings menu
3. GNSS and Time Fix Requirements #
SLAM missions may or may not require GNSS depending on your hardware and whether the data needs to be georeferenced.
RESEPI LITE & Ultra LITE (GNSS Denied Use) #
- No GNSS setup is required.
- You may skip the time fix steps and proceed directly to data collection.
RESEPI GEN-II #
- Connect the GNSS antenna before starting.
- Begin the procedure outdoors with clear satellite visibility.
- Wait for a valid time fix before scanning:
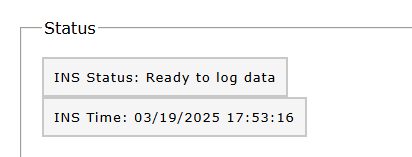
- In the Web UI, verify the INS status window.
- A successful fix is indicated by:
- The correct current date/time
- Status: “Ready to log”
Once this message appears, scanning (including indoors) can begin.
Georeferenced SLAM (All Models) #
- GNSS time fix is required.
- Start and preferably end the mission outdoors in GNSS-friendly conditions (clear sky, minimal obstructions).
- Confirm “Ready to log” status in the Web UI before proceeding, as shown below.
4. Starting a SLAM Scan #
- Begin Recording:
- In the Status window, press “Start”
- Alternatively, tap the power button to begin data logging.
- IMU Initialization:
- Keep the RESEPI completely still for 10 seconds to allow IMU alignment.
- Avoid motion during this period.
5. Scanning Procedure #
- Static Start and Finish. Hold RESEPI completely still for 10 seconds at the start and end of the scan. If possible, place RESEPI on a stable, level surface.
- Smoothness is the Key to Success. Lift the device slowly, turn smoothly, and avoid shaking or sudden jerks. The less shaking, the more accurately the mathematical algorithm will track your path.
- Maintain a Constant Pace. Walk at approximately 1 m/s, as if you were walking normally (the System supports speeds up to 30 mph, but a slower pace is ideal).
- The scanner should always “see” contrasting terrain. SLAM needs a sufficiently complex environment for determining it’s own relative position. Avoid large, wide open areas or low complexity scenes like interior corridors.
- Maintain your distance (operating range). Don’t move the device too close to walls or too far away. The laser has a “blind spot” near the surface and a range limit where the beam dissipates and produces a lot of “noise.” The optimal distance is from 1.5 to 15-20 meters.
- Don’t block the view. Make sure your body doesn’t block the LiDAR. If your body obscures part of the LiDAR, the algorithm will filter out within 2m by default but processing may struggle due to the lacking field of view.
- Pause when entering doors. Open doors before scanning. Pause briefly at the threshold. A doorway is like a narrow opening. Pause there for a second to allow the scanner time to connect the geometry of “room A” and “room B.”
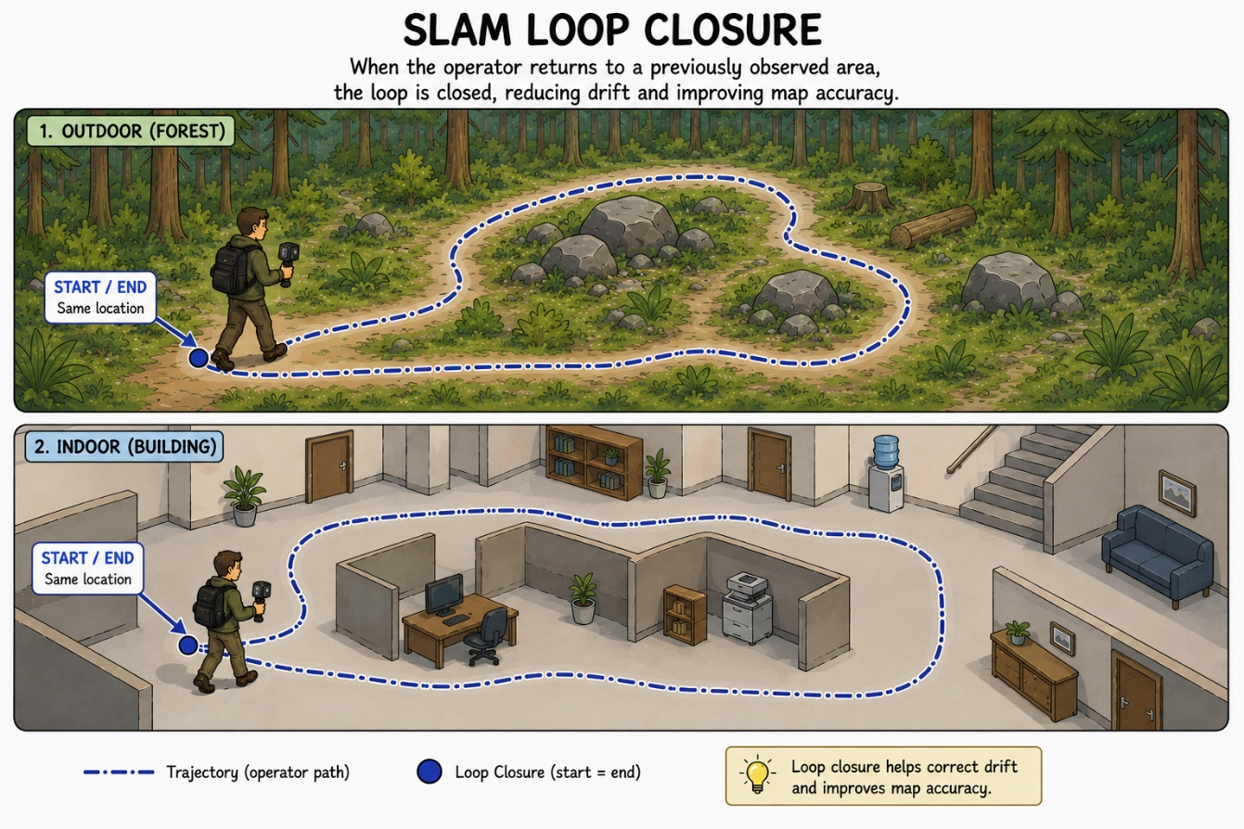
- Properly close loops (Loop Closure). When returning to a point you’ve already passed, follow the same route for at least 5-10 meters. Simply touching the starting point isn’t enough. You need an overlap: retrace your steps a bit so the algorithm can confidently recognize the location and “stitch” the beginning and end of the trajectory together.
- Avoid live traffic. Crowds of people, busy roads, or swaying branches create chaos for the algorithm; it will try to treat a moving object as if it were static, but the object disappears from view.
- Don’t make scans too long. It’s better to take three 10-minute scans than one giant 30-minute scan. There are no hard limits, but the longer a single scan, the greater the accumulated system error. Small scans are faster to process, check, and adjust on the computer.
5.1. How to adapt the route to different terrain #
- Rooms and Long Hallways. Start with a lot of detail. In long hallways, don’t walk straight down the center! Move in a gentle snaking motion, aiming the scanner at doorframes, paintings, and flanks. When you walk straight down the center of a long hallway, the left and right walls appear the same to the scanner along the entire length (like a tunnel). This slight “snaking” creates a viewing angle that allows the scanner to see the depth of door niches and protruding elements.
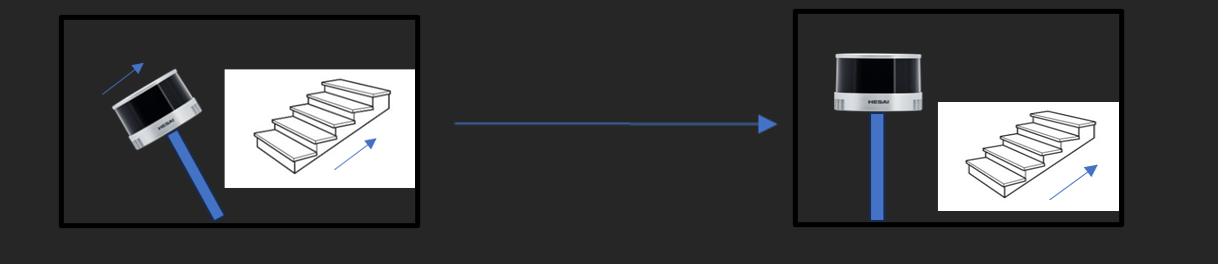
- Stairs and Interfloor Passages. Move smoothly, pausing on landings. On open areas, slowly turn the scanner up and down. Stairs are complex elements, as the elevation coordinates begin to change abruptly. A delay and a smooth sweep of the area help the device “link” the floor of the lower floor to the ceiling/floor of the upper floor.
- Open Areas and Building Facades. Don’t make one huge circle around the block. Make small loops around individual buildings or sculptures. In an open field, the scanner has nothing to latch onto (no walls or ceiling, just flat ground). Small loops maintain accuracy. Satellites (RTK) are very helpful for linking to real coordinates here, so it is always recommended to use GNSS recording in open areas.
- Forests and Dense Vegetation. Slow down your walking speed. Use large tree trunks as landmarks. Leaves and grass move in the wind, which confuses the algorithm. However, tree trunks are solid and immobile. The scanner uses the trunks as “landmark poles,” so it’s important to move more slowly, giving the device time to recognize them.
- Tunnels and Underground Workings. Your only route is out and back. Go deep, turn around, and return the same way. It’s impossible to make a “circle” in a tunnel. Therefore, returning along the same trajectory is the only way to “close the loop” and reduce the accumulated error.
- Glass, Water, and Darkness. The laser is unaffected by darkness (it emits light itself), but the laser beam penetrates glass and is absorbed by water, creating holes in the point cloud or “phantom” walls. Scan such areas at an angle, not head-on, to minimize direct reflections.
XT-32, XT32-M2X LiDAR Users #
- In dense metallic or structured areas (e.g., stadiums, framing, HVAC systems, temporary structures):
- Go to LiDAR Service Tab for LITE/Ultra LITE or GEN-II in Web UI and enable Interstitial Points Filtering
- This removes stray points and improves SLAM precision.
- Go to LiDAR Service Tab for LITE/Ultra LITE or GEN-II in Web UI and enable Interstitial Points Filtering
6. Ending the SLAM Scan #
- Final Static Alignment:
- Hold the unit still for ~5 seconds to help finalize IMU alignment.
- Stop Recording:
- Use the Web UI “Stop” button.
- Or press the Power Button again.
7. Shutting Down the Device #
- Standard Shutdown:
- Press “Shutdown” in the Web UI
- Or hold the Power Button for 4 seconds
- Emergency Shutdown:
- Hold the Power Button for 10 seconds
- Note: This may interrupt logging — only use if necessary.
8. Retrieving and Processing SLAM Data #
- For GEN-II devices only, navigate to Storage and transfer the dataset from internal to USB storage
- Remove the USB drive
- GEN-II: Ensure transfer to USB is fully completed before removal
- Transfer files to your computer.
- Use PCMasterPro software to post-process and generate point clouds.