
Cloud Analysis Features #
PCMasterProGL offers various features for in-depth analysis of point clouds, including:
- Trajectory Information
- Cloud Slicing at Focus Point
- Color by Height/Intensity/Laser/Selection/Return ID
- Cloud Measuring at Focus Point
Getting Trajectory Information #
To retrieve trajectory information:
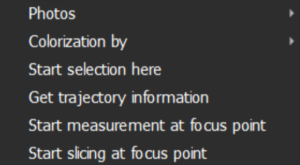
- Right-click on a point along the trajectory line in PCMasterProGL.
- Select “Get Trajectory Information” from the context menu, as shown below.
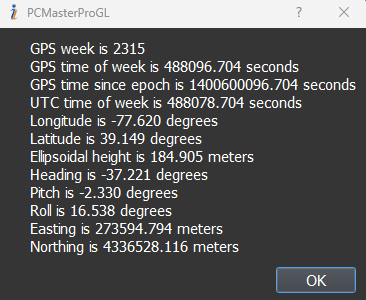
- A window will appear displaying the following details for the selected trajectory point, as shown below:
- GPS Week
- GPS Time of Week (in seconds)
- UTC Time of Week (in seconds)
- GPS Time Since Epoch (in seconds)
- Longitude (in degrees)
- Latitude (in degrees)
- Ellipsoidal Height (in meters)
- Heading (in degrees)
- Pitch (in degrees)
- Roll (in degrees)
- Easting (in meters)
- Northing (in meters)
Cloud Slicing at Focus Point #
To create a slice of the point cloud at a focus point:
- Move the focus point to the desired location for the back plane of the slice. Right-click and select “Start Slicing at the Focus Point”.
- Move the focus point to the location of the front plane of the slice. The slice will update as the focus point moves. The slice can be tilted or horizontal based on altitude changes (hold Ctrl while dragging the focus point).
- To change the starting point, right-click and select “Restart Slicing at the Focus Point”.
- To finalize the slice, right-click at the location of the front plane and select “Finish Slicing”. Moving the focus point further will no longer affect the slice.
- To move the slice, hold Ctrl and scroll the mouse wheel.
- To adjust the thickness of the slice, hold Ctrl and Shift and scroll the mouse wheel.
- To cancel slicing and return to viewing the entire cloud, right-click anywhere and select “Cancel Slicing”.
Coloring by #
To change the coloring criteria of a point cloud:
- Right-click anywhere on the cloud.
- Choose from the following colorization options:
- Color by Height: Colors the points based on elevation, which is the default setting.
- Color by Intensity: Colors the points according to the return strength of the laser beam, useful for distinguishing ground features. Intensity colors will correspond to the selected path’s color if multiple paths are chosen.
- Color by Laser: Colors the points based on the laser that generated them, with colors corresponding to those defined in LiDAR Tools > Lasers.
- Color by Selection: Colors the points based on the path that generated them, with colors corresponding to those listed in LiDAR Tools > Paths.
- Color by Return ID: Colors the points based on the return ID allocated by the LiDAR scanner.
Cloud Measuring at Focus Point #
To measure distances in a point cloud:
- Right-click at the focus point and select “Start Measurement at Focus Point”.
- Adjust measurements in the North and East directions by holding the Control button, left-clicking, and dragging the line.
- Adjust the measurement in the upward direction by holding Shift and Control buttons, left-clicking, and dragging the line.
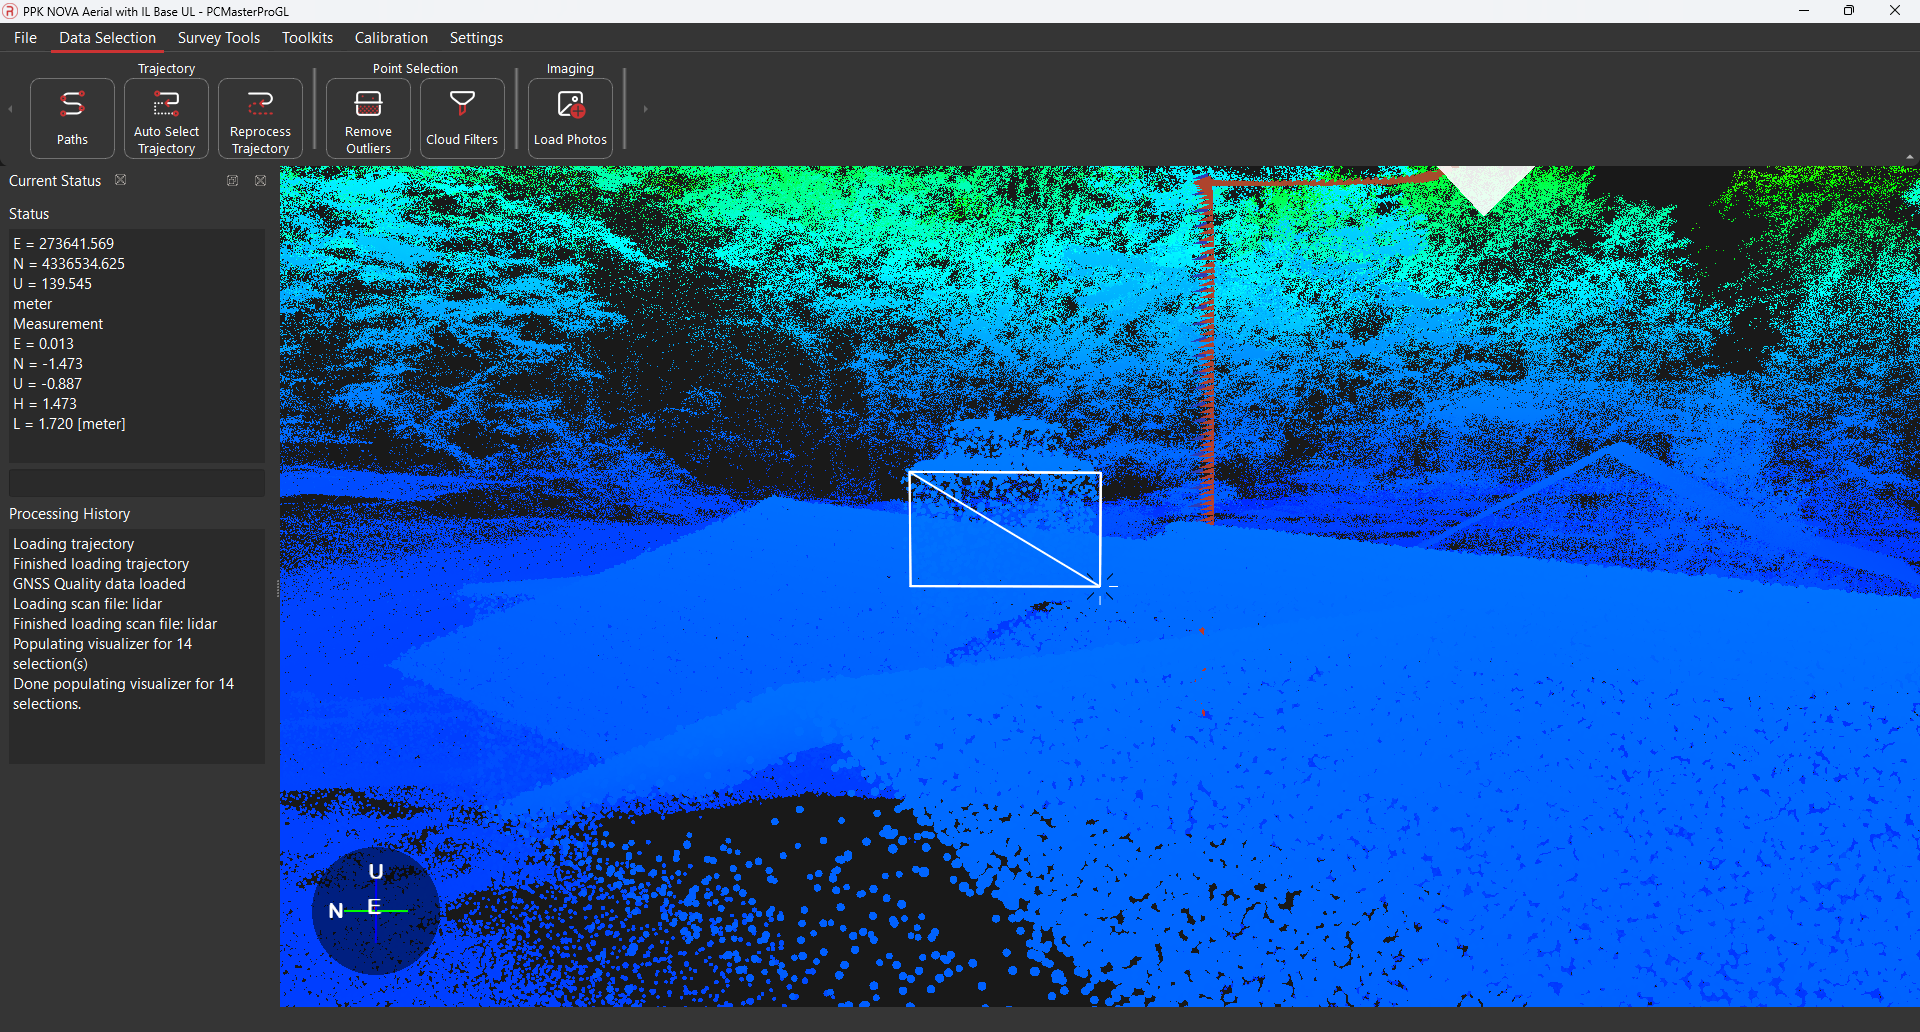
A three-dimensional box will appear around the measurement line, displaying East, North, Height, Up, and Length measurements in the status bar on the left side of the window, as shown below.
A visual demonstration of cloud analysis is shown in the video posted below.