
Default Batch Processing #
The Batch Processing tool is designed for processing multiple projects simultaneously and can be used for both RTK and PPK datasets.
Detailed Procedure #
Transfer Data:
- After recording a dataset, remove the USB thumb drive from the payload and plug it into the computer used for data processing.
- Navigate to the root folder containing the recorded dataset and copy the entire flight folder locally to the computer for faster processing speeds.
- If a custom project name was set through the “Status” page of the GUI, it will appear as a prefix to the automatically configured flight name stamped with UTC time. The generic naming convention for the dataset is as follows: RESEPI-AAAAAA-BBBB-CC-DD-EE-FF-GG
- AAAAAA: The device’s internally broadcasted Wi-Fi SSID.
- BBBB: The year the data recording was initialized.
- CC: The month the data recording was initialized.
- DD: The day of the month the data recording was initialized.
- EE: The hour of the day (based on 24 hours) the data recording was initialized.
- FF: The minute of the day the data recording was initialized.
- GG: The second of the day the data recording was initialized.
- If a custom project name was set through the “Status” page of the GUI, it will appear as a prefix to the automatically configured flight name stamped with UTC time. The generic naming convention for the dataset is as follows: RESEPI-AAAAAA-BBBB-CC-DD-EE-FF-GG
Activate License:
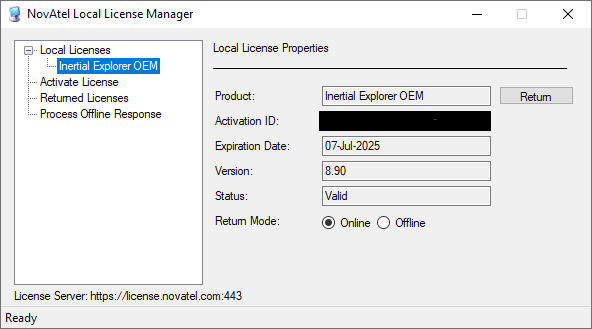
- Ensure that your PPK license is activated when performing PPK processing, as shown in Figure 1.
- Configure Batch Processing:
- Open PCMasterProGL and navigate to Batch Processing > Configure Batch Processing.
- Do not close the PCMasterPro window, as it will be used for trajectory selection.
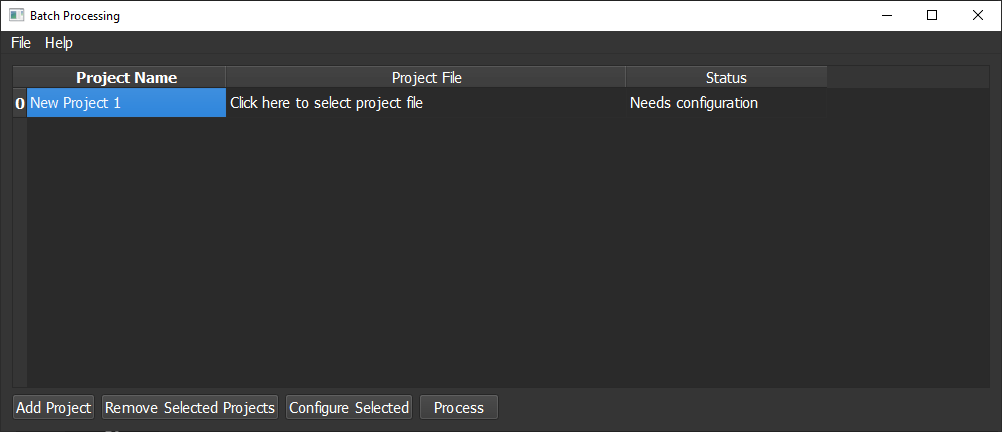
- Optional: Name the first project by selecting “New Project 1” under the “Project Name” tab, as shown in Figure 2.
- Select “Click here to select project file” and navigate to the .pcmp file for the desired project.
- Allow time for unpacking data files after file selection. Progress will be shown in the bottom left corner of the PCMasterPro window.
- Configure the project:
- Select “Needs Configuration”.
- Select the project number on the far left, then select “Configure Selected”.
- Open PCMasterProGL and navigate to Batch Processing > Configure Batch Processing.
- Project Configuration:
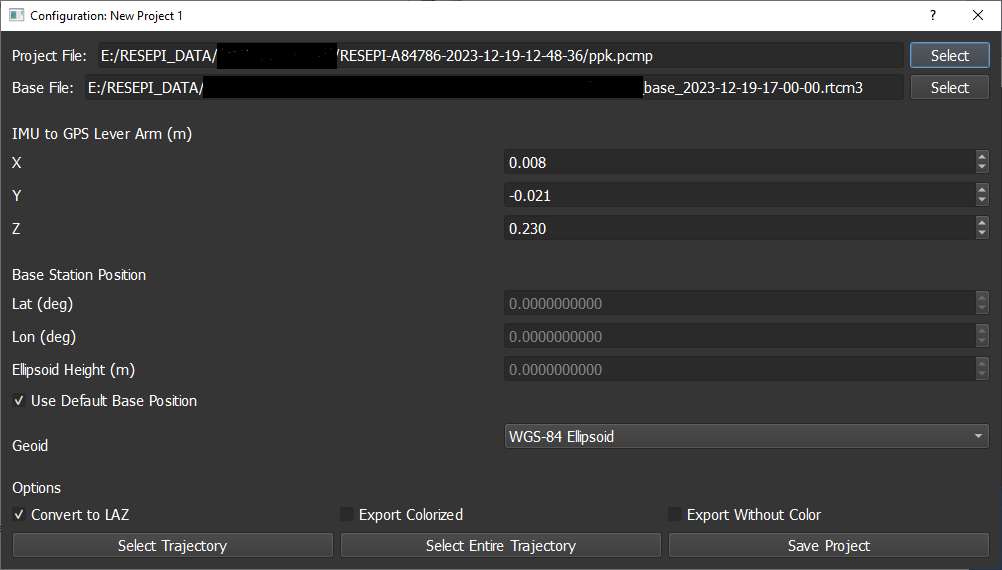
- In the configuration menu, select the “Select” button next to “Base File:” to choose the base station file, as shown in Figure 3. Navigate to the base station file to be used in processing this dataset.
- Input the “IMU to GPS Lever Arm” values.
- These values will be automatically entered according to the preset values within the RESEPI GUI prior to recording and can be adjusted if needed.
- Enter the Latitude, Longitude, and Ellipsoidal height values for the base station used for recording.
- These values will be detected by PCMasterPro and generally do not need adjustment unless the base station data was post-processed. Simply checking “Use Default Base Position” will be sufficient for most users.
- Select the preferred Geoid model for processing the project.
- Further options include “Convert to LAZ” and “Colorize”:
- “Convert to LAZ” will compress the final cloud into a smaller file, formatted as “.laz” instead of “.las”.
- “Colorize” will colorize the point cloud. Uncheck if no colorization is required.
- Choose to “Select Trajectory” or “Select Entire Trajectory”:
- “Select Trajectory” allows specific portions of the cloud to be identified for export.
- “Select Entire Trajectory” will export all points along the entire trajectory with default cloud filters applied (LiDAR field of view and range).
- Save the project by selecting the “Save Project” button.
- Add, configure, and remove as many projects as needed:
- Add another project by selecting “Add Project”.
- Remove a project by highlighting the project number on the far left and selecting “Remove Selected Projects”.
- Settings and Processing:
- If merging LAS/LAZ clouds from multiple projects into a single file, processing all datasets simultaneously, deleting unnecessary cloud files, or changing the output directory is needed, configure these options within File > Settings in the Batch Processor window.
- The default output directory for any project is the “clouds” folder within each project folder.
- The “clouds” folder is only created upon LAS export, so it will not be visible upon unpacking.
- The default output directory for any project is the “clouds” folder within each project folder.
- If merging LAS/LAZ clouds from multiple projects into a single file, processing all datasets simultaneously, deleting unnecessary cloud files, or changing the output directory is needed, configure these options within File > Settings in the Batch Processor window.
- Begin Processing:
- When ready to begin processing, select the “Process” button.
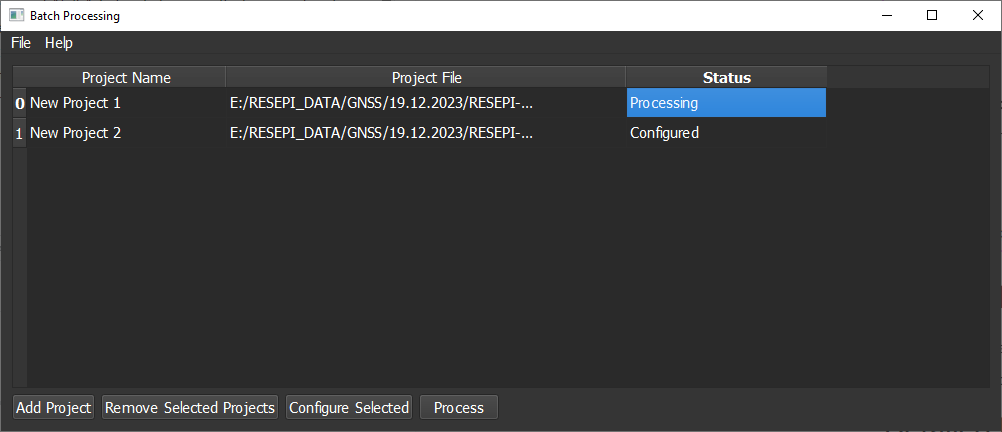
- “Processing” or “Waiting” will be shown in the “Status” column, as shown in Figure 4. Upon completion, the clouds will be produced in the “clouds” folder unless specified otherwise.
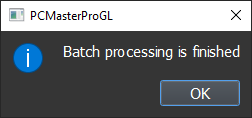
- A pop-up message will indicate when processing and projection are finished, as shown in Figure 5.
- When ready to begin processing, select the “Process” button.
To observe the entire process in practice, we suggest viewing the video recording below.