
RTK Mission Step-by-Step #
1. Pre-Mission Planning #
- Confirm Mission Requirements
- Incorporate convergence maneuvers for best IMU initialization:
- Take off vertically to mission altitude.
- Fly forward laterally for at least 5 seconds at 5 m/s or faster.
- Perform at least one figure eight at constant altitude.
- After mapping, fly forward again for at least 5 seconds at 5 m/s or faster before landing.
- Land vertically with minimal lateral motion.
- Incorporate convergence maneuvers for best IMU initialization:
- Survey Ground Control (Optional)
- If performing accuracy validation or ground registration, survey known GCPs using a total station or GNSS receiver before the mission. Mark their locations clearly in the field.
2. Mounting #
- Securely Mount the Payload
- Make sure the RESEPI unit is rigidly fixed to the aircraft. Avoid vibration-prone mounts.
3. GNSS Setup #
- Connect GNSS Antenna
- Attach the provided dual-band GNSS antenna to the RESEPI. Confirm the cable is secure and not kinked or bent. Mount the antenna where it has a clear sky view.
- Start Outside for GNSS Time Fix
- Power on the RESEPI outdoors in an area with good sky visibility. Wait for the status to show “Ready to log”—this confirms time fix and satellite lock.
4. USB and Power Check #
- Check USB Drive
- Ensure a compatible USB is inserted.
- Ensure Connected USB RTK Modem
- Essential for RTK datasets. For in-flight RTK corrections, the recommended wireless modem is the ZTE MF833V.
- Confirm Battery/Power Supply
- Verify your drone or handheld system provides consistent 9–36 VDC to the RESEPI payload. Confirm the connector (XT60, Skyport, Binder, or Ethernet GEN-II).
5. Web Interface Setup #
- Connect to Wi-Fi
- Connect your phone/tablet/laptop to the RESEPI’s Wi-Fi SSID (printed on the label). Password is: LidarAndINS
- Open a browser and go to: 192.168.12.1
- Check Internal Storage (GEN-II or EchoONE only)
- Ensure internal storage is sufficient via the Web GUI.
- Check USB Drive
- It must have enough free space for your planned mission. Format if needed.
- Set Project and Metadata
- In the web UI, enter mission name, operator info, and any other metadata for future reference.
- Set Logging Destination
- Choose whether to log to USB or internal memory. GEN-II units default to internal logging and must be manually copied to USB.
- Confirm IMU Orientation Setup
- Navigate to: Settings > Geometry > Vehicle to IMU Rotation. Set the IMU mounting angles.
- Navigate to: Settings > Geometry > Vehicle to IMU Rotation. Set the IMU mounting angles.
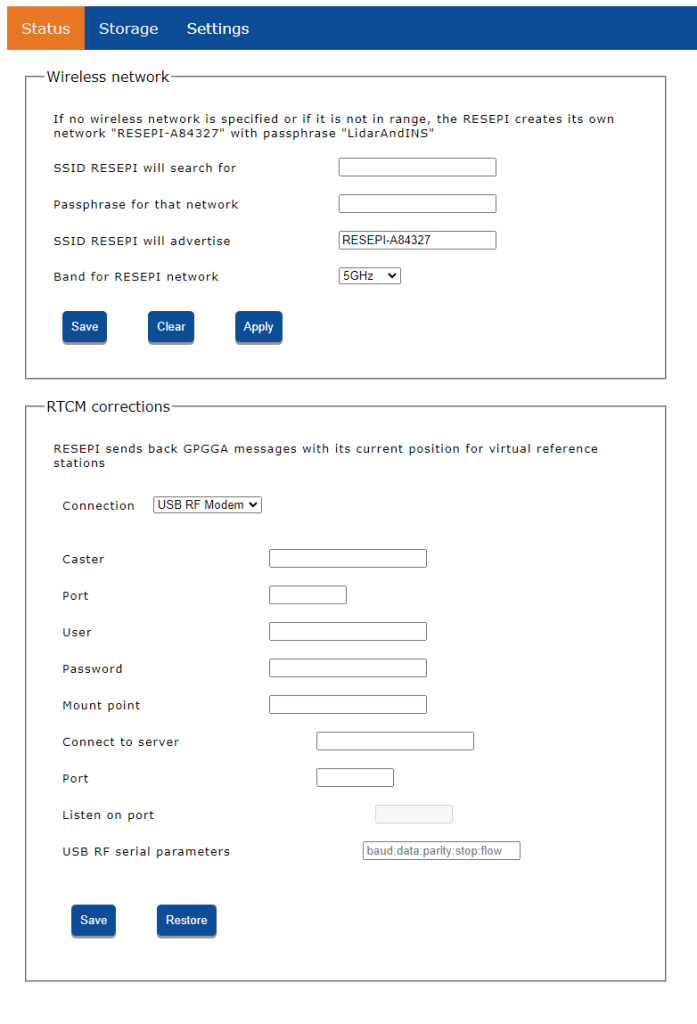
- RTK Base/NTRIP Connection, shown in Figure 1
- Connect the device to a base station or configure NTRIP login via the web UI. You must maintain corrections throughout flight.
- After saving the connection details, confirm receipt of corrections by checking for live base station coordinates on the Status page. If not shown, recheck your settings. When the unit begins recording and RTK is active, the Boot LED will flash solid green with three red flashes, indicating RTCM corrections are being received.
6. Final Pre-Flight Steps #
- Verify Logging Status
- Confirm the system shows “Ready to Log” with valid GPS time and INS initialized.
- Confirm IMU Initialization
- Before moving the aircraft or handheld system, allow the unit to sit still for ~10 seconds after power-up for IMU alignment.
- Begin Recording
- Start recording via the web UI or tap the power button. Logging will begin and sensor data will be recorded.
- Once recording starts, the Boot LED on the side of the unit will blink 3 times incrementally (solid green with 3 red flashes), indicating successful receipt of RTCM traffic from the base station.

7. In-Flight Best Practices #
- Maintain GNSS Lock
- Ensure RTK corrections are being received throughout the flight. Watch for correction dropouts in real time, if available.
8. Ending the Flight #
- Hold Still for Final Alignment
- After landing, keep the unit still for 5–10 seconds to finalize IMU data.
- Stop Recording
- Use the Web UI “Stop” button or press the power button again.
- Shut Down Payload
- Use the web UI “Shutdown” or press and hold the power button for 4 seconds. (Hold 10 seconds for emergency shutdown.)
9. Post-Flight Data Handling #
- Transfer Files (GEN-II only)
- Go to the Storage tab and transfer files to the USB before unplugging it.
- Remove USB and Transfer to PC
- Safely remove the USB and copy the contents to your computer.